Showing posts with label red. Show all posts

Wednesday, January 30, 2013

Nail Foil Tutorial - How to apply nail foil on curvy nails

Hello everyone! ^^
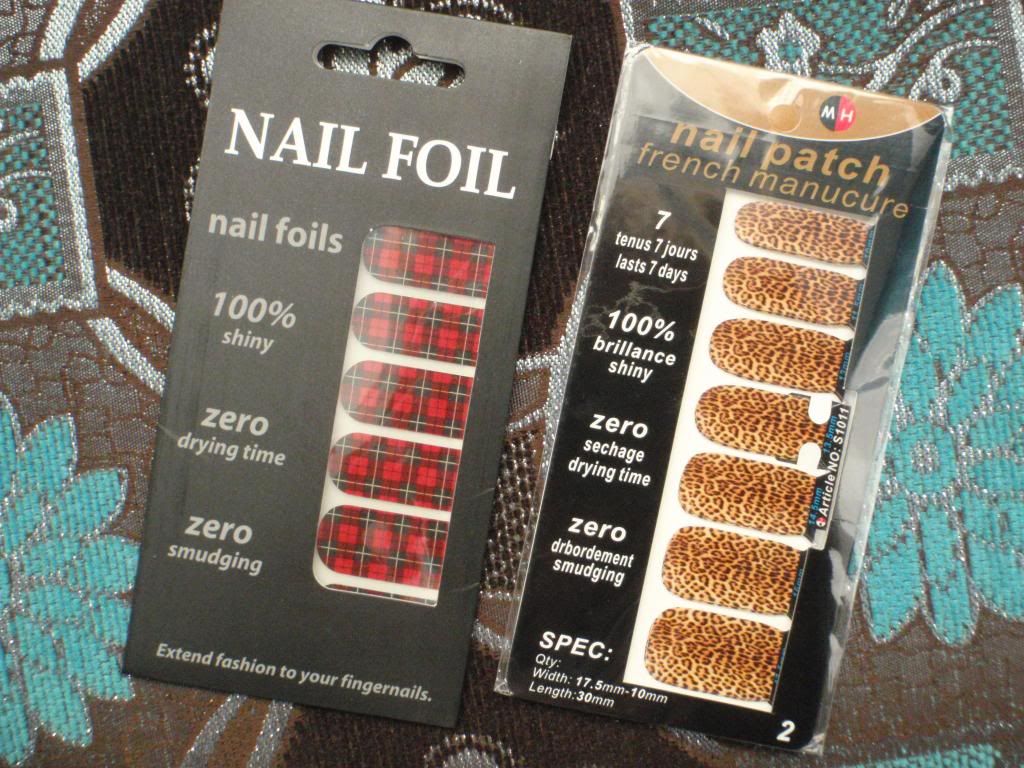
I've always been very curious about nail foils and nail polish strips, but also quite precautious about whether they would work for me or not, since my nails are so curvy. :P I mean, I love the idea of an easy way to create complicated designs, but I've always had trouble to make even slightly larger than usual stickers to settle nicely on my nails, so what would happen with stickers that cover my entire nail? Because I wasn't sure I would like the result, I just kept to regular nail polish. However, couple weeks ago I was contacted by OMG Nail Strips, asking if I would be interested in trying free samples of their nail polish strips or nail foils. Of course I was interested! :D Finally a chance to find out what these things are all about. :)


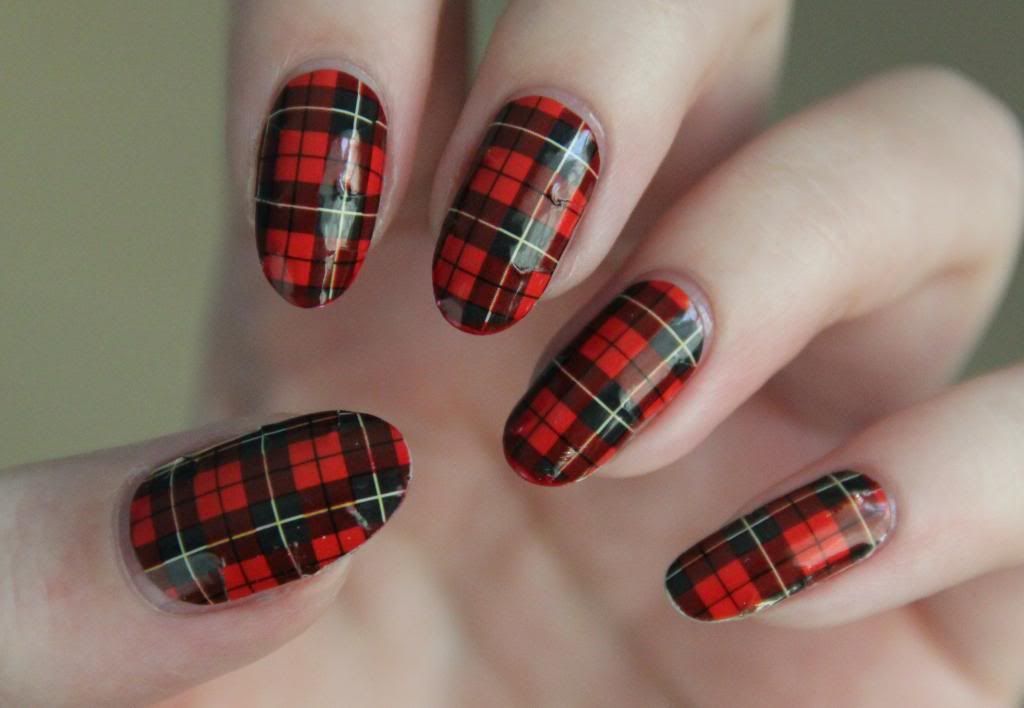
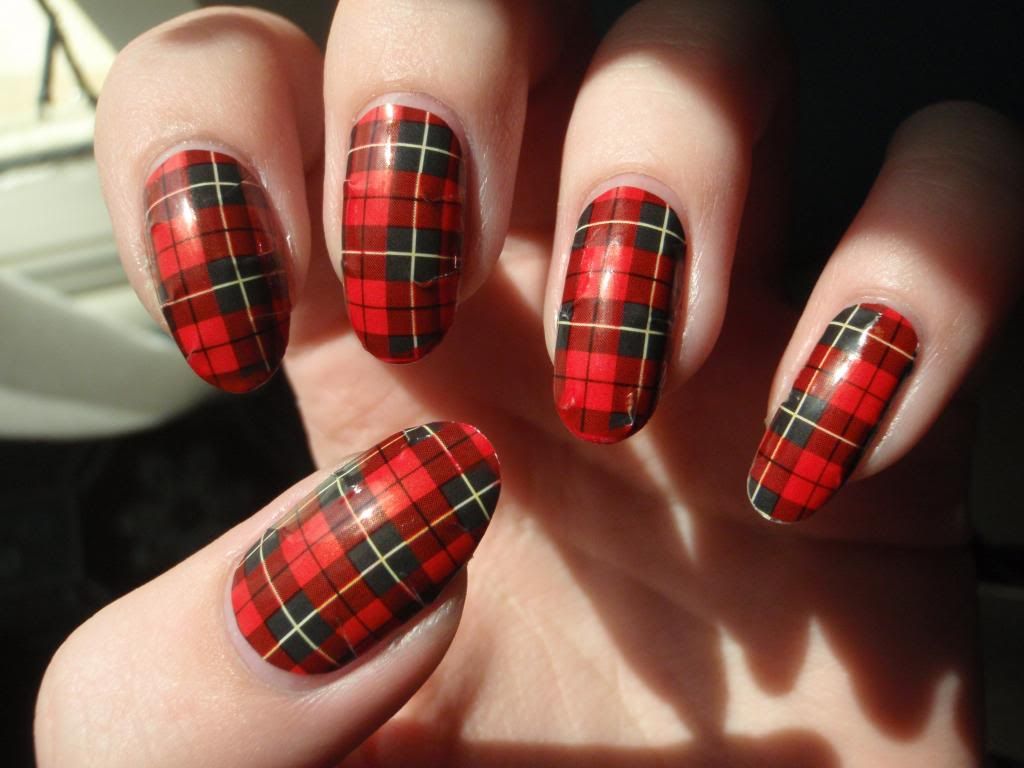
First I wanted to try the nail foils, and this is how they turned out. :) As you can see I also changed my nail shape! I've always liked my nails square, but now I wanted something different. I've had round nails once before, but I didn't really like them... Probably because I didn't make them round enough and they were too long. :P Anyway, this time I really like them!
Now for the tutorial:


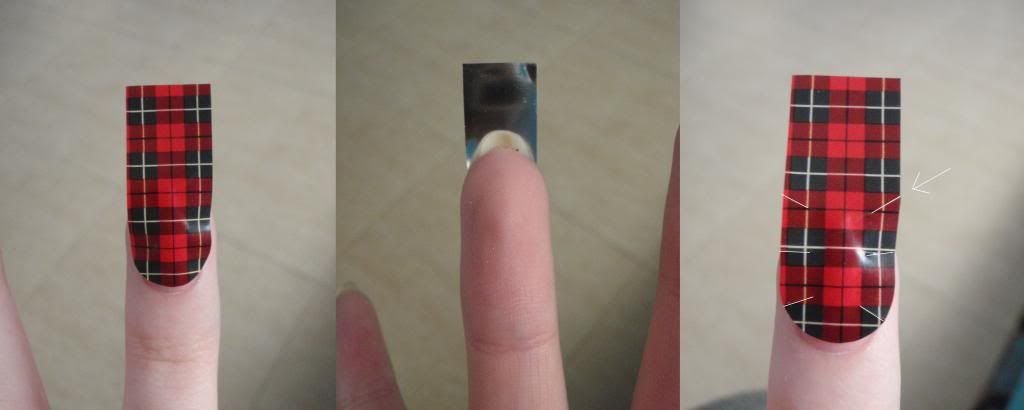
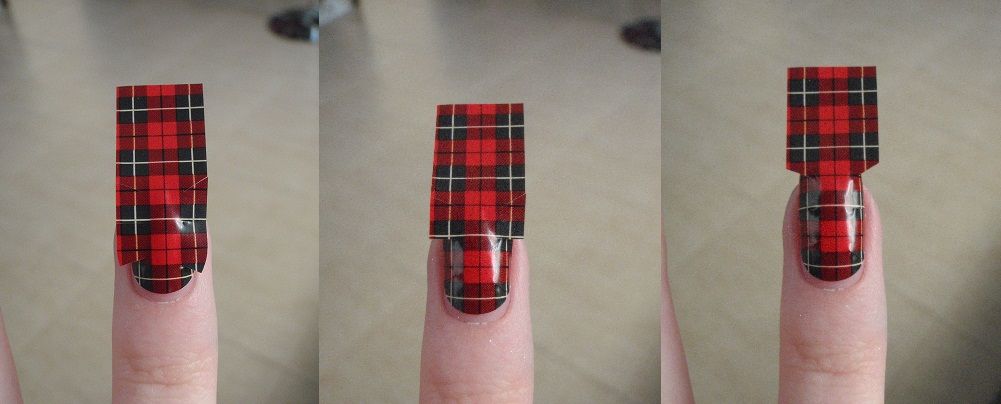
1. Pick the right size. Do not use base coat, the nail foils should be applied on clean nails!
2. You don't have to shorten it yet, just make sure the foil is wide enough to cover your whole nail.
3. I had some trouble making the foil stick to my nail smoothly without bumps or wrinkles, so I came up with my own method of applying them. Cut the foil from edges towards the center as shown in the picture, depending on the length of your nails.


4.-6. Start pressing the tears on the nail surface from bottom to top, as shown in the picture. Rub them firmly to make them stick smoothly.


7. Rub the last bit firmly on the tip of your nail. It should look like this at this point. ^


8. Cut the excess foil from the tip.
9. File the edge to make it smooth, and add top coat. The top coat isn't necessary, but I found it made my nails smoother and made the edges stick better.


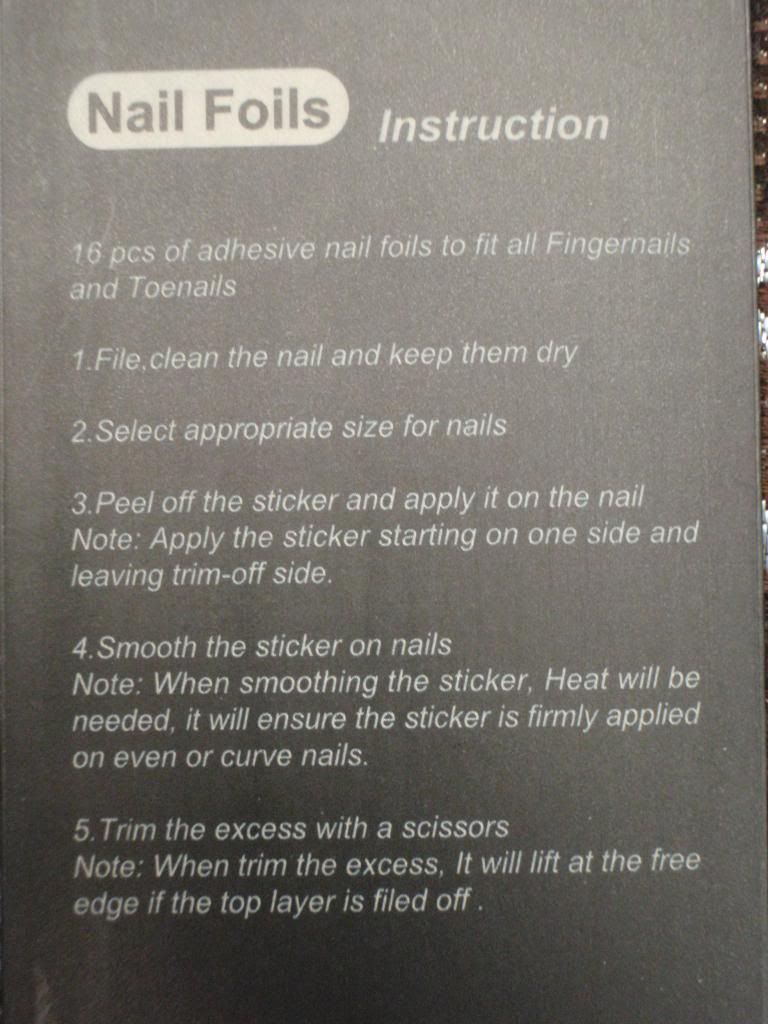
And you are done! As I expected, I struggled to apply the foils smoothly, but after I came up with the solution I'm quite happy with the result. :) One thing I didn't quite understand though, was the bit in the instructions that said 'heat will be needed'. How was I supposed to apply heat? :'D The nail foil design I chose is Red Plaid, although it was a difficult choice... Click the link for more details of the product!
Next up, the nail polish strips! ^^

Thursday, December 27, 2012

Red & Gold Christmas Nails

I hope everyone had a peaceful christmas! ^^
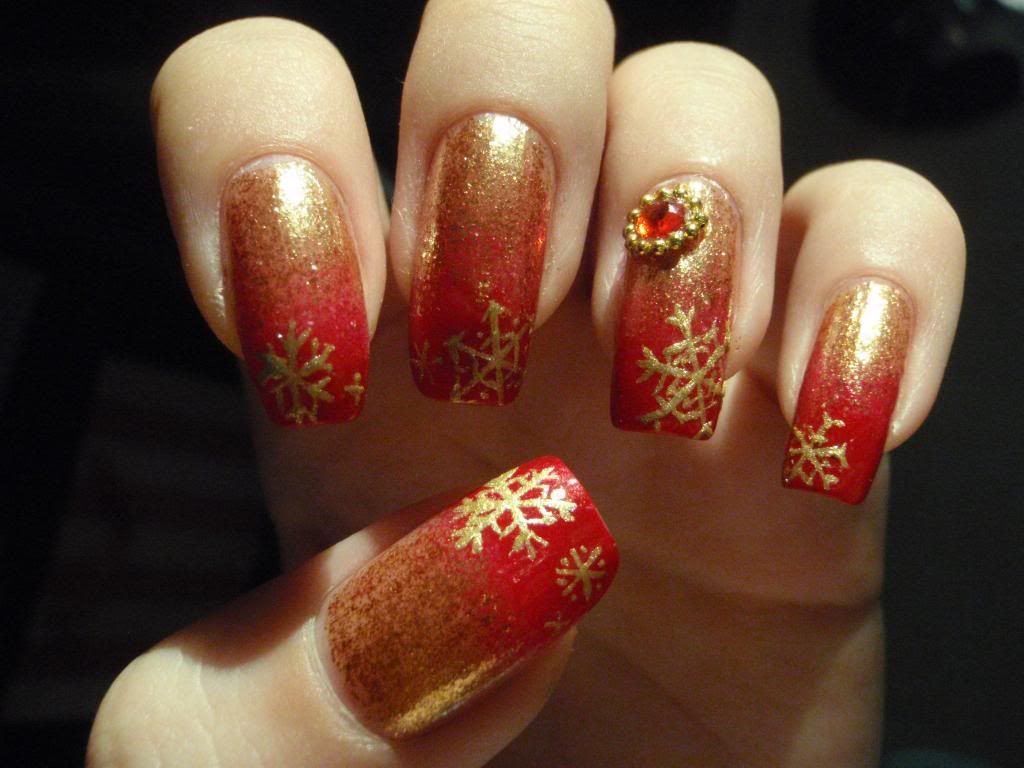
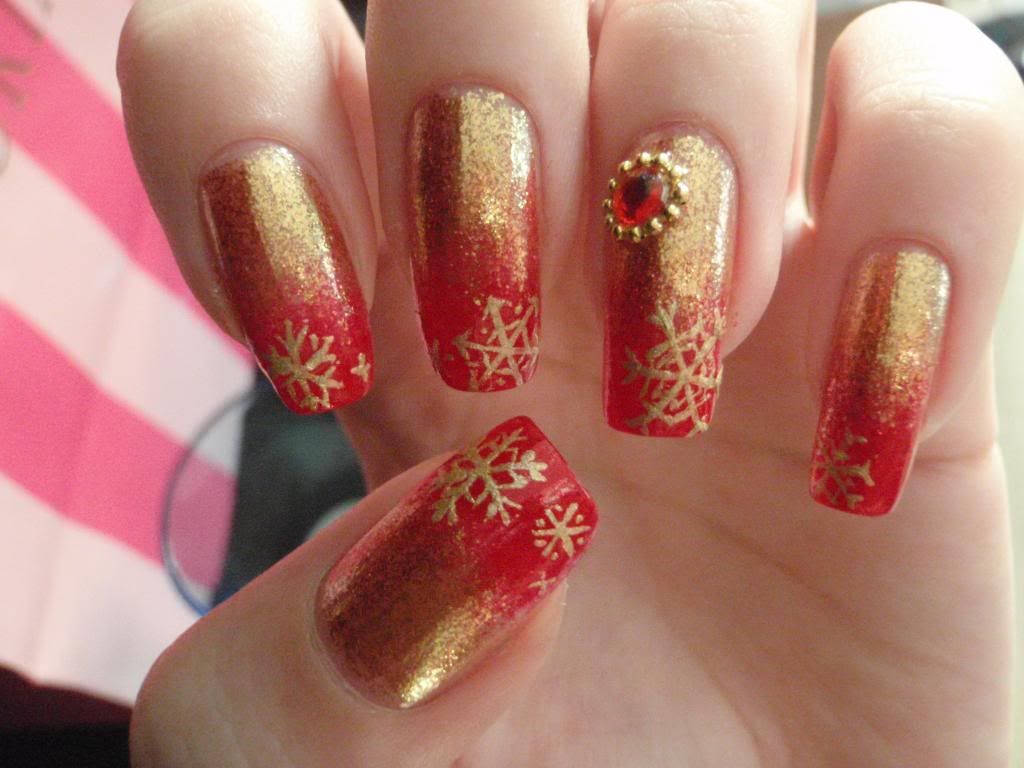
Here's how my nails looked like during the christmas holidays:


I wanted to use the mini polishes by OPI because I was so inspired by their christmasy colours! :D So first I polished my nails with two layers of Goldeneye. Then I sponged The Spy Who Loved Me on the tips, and started decorating! ^^ I used Golden Rose nail art polish for the snow flakes, and I'm so happy with the way they turned out, since it's been so long since I last did snow flakes... Then I felt they needed a little something more so I added the rhinestone on the ring finger. :)


Whee, they are so sparkly! :D I loove Goldeneye, I actually think it's my favorite polish at the moment!
See you guys soon, enjoy the holidays! ^^

Wednesday, November 28, 2012

Diamonds & Gold

Hello everyone!
I recovered (hopefully!) from my previous blogger crisis... Let me know if you can see the pictures, I have now started to use Photobucket, hopefully successfully! :) Thank you so much for the advise, shiny! Huh, maybe I've learnt my lesson - from now on I'll think before I upload. =_= Still, I love posts with lots of pictures, why does blogger have to be so greedy? >:(


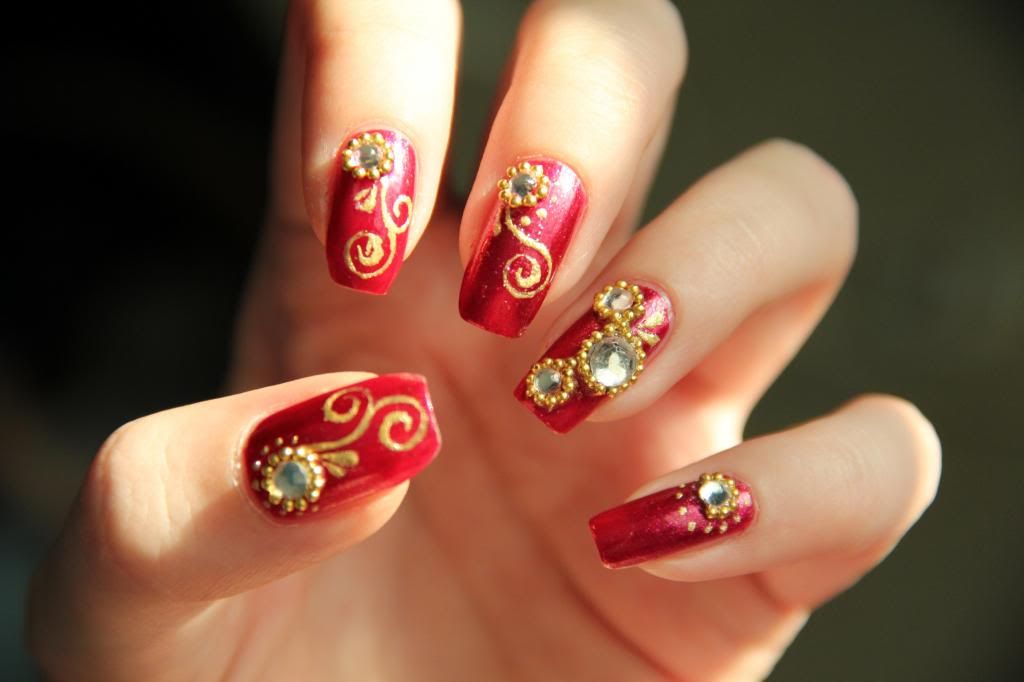
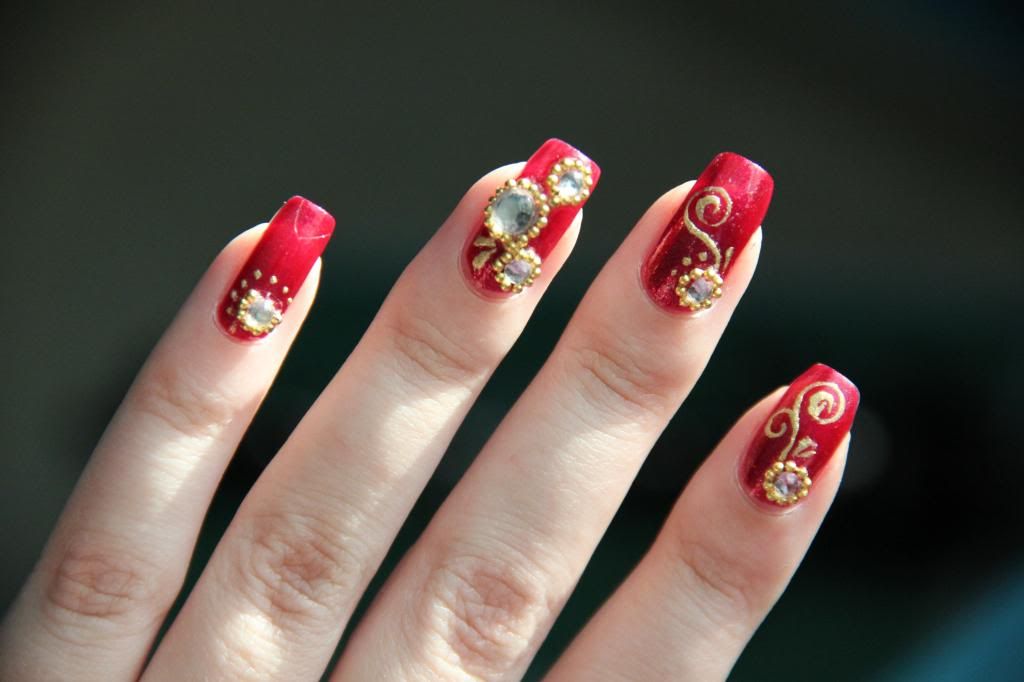
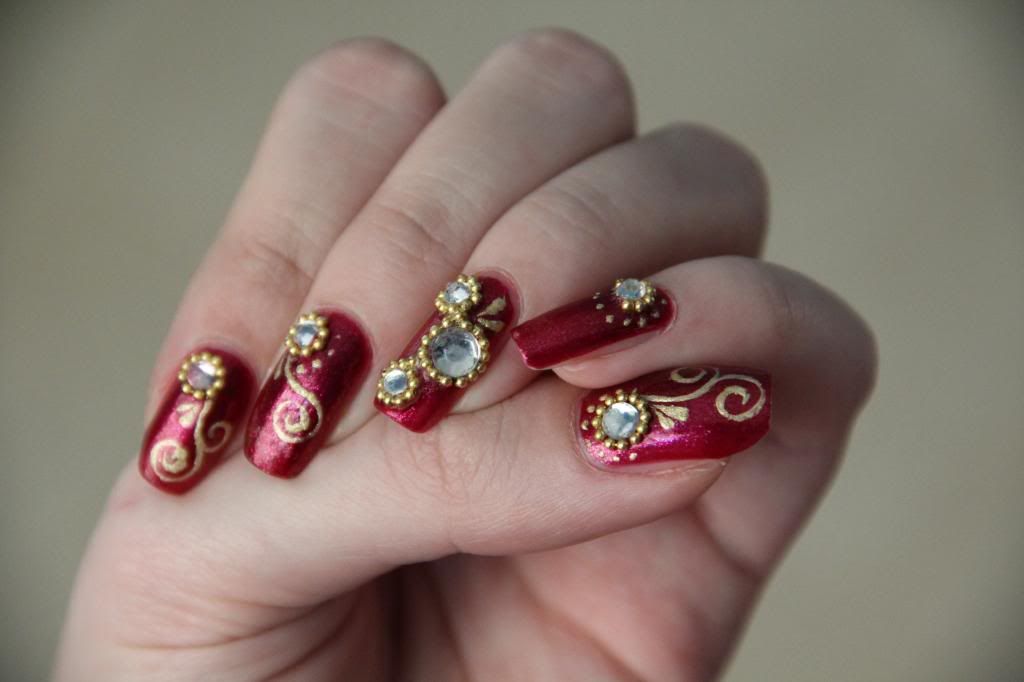
So, as I promised - my latest nails! I hadn't done anything special on my nails for so long, that I almost went over the top.... :'D But I am so happy with the result! Also I kinda felt I had to prove myself I can still create beautiful nail art and details!


I used Be a Dahlia Won't You? by OPI and Golden Rose nail art polish in gold for the swirls. I just love that polish, it would've been gorgeus even without the decorations but oh well. The diamonds and micro pearls are from a local craft store. :)
Also, lately I havent been happy with the quality of the pictures on my old Olympus digital camera, so I've tried to take my nail photos with my Canon supercamera... xD Sadly I only have this huge zoom lense, which is perfect for taking pictures from long distance, not so great for trying to take close ups from your own nails if you know what I mean... :'D Haha, I need my own nail photographer if I wanna keep up with that camera. :P What do you guys think of the quality? worth it?


I know these are a bit out of focus, I have to use auto focus because I can't focus manually with one hand. ::D Well, I keep practising, see you soon! ^^

Friday, November 18, 2011

Oriental


Hello!!
Long time no see, and this time I have quite resent nail design to show you! :D Ok ok I made these few weeks ago but it's still recent compared to those I did in Finland. :'D
I used The One That Got Away from OPI Katy Perry collection, it's one of my favorite polishes! :D I did the golden ornament things with Golden Rose nail art polish. :)

ps. Thank you everyone for your sweet comments in the previous post, I really appreciate it! <3

Eli vähän uudemmat kynnet pitkästä aikaa, pohjana käytin OPIn Katy Perry kokoelmasta The One That Got Away, yksi mun lempparilakoista tällä hetkellä! :D Kultaiset kiemurat tein Golden Rosen koristelulakalla. :) 


Tuesday, September 27, 2011

Rhinestones


I really want to update more often but I simply don't have time.. :/ But anyways, here's another manicure I did in summer. ^^

Creative - Baroque (not sure if I remember it right, but anyways :'D)
Just love it, such a beautiful dark red! ^^

They don't sell my favorite nail glue anymore, and this new one is driving me crazy.... >_< I can't remember the name, but it was pink gel glue. This new one isn't gel-like as the old one, so it's more difficult to apply easily... I had nail glue all over my cuticles. :< I like the result though! ^^
I think I'll post some newer designs next time, I have loads of pics in my camera! ::D

Jälleen yhdet kynnet kesältä! Seuraavaksi julkaisen varmaan jotain vähän uudempaa, kamera on taas täynnä uusia kuvia... :'D
Näihin käytin kuitenkin melko vanhaa Creativen lakkaa, nimi oli muistaakseni Baroque. Blingejä liimasin vain nimettömään, koska vanha kynsiliimani loppui enkä tykkää uudesta... :< Tietääkö kukaan mistä saa niitä kynsiliimoja mitä Seppälässä myytiin ennen?? En muista nimeä, mutta pakkauksessa luki ainakin pink gel glue. :P Tämä uusi nimittäin leviää helposti pitkin kynsinauhoja... :'D


Monday, June 20, 2011

Thank you, KarzU!

My sister KarzU won a giveaway, and she wanted to polish my nails with her new polishes. Check out her BLOG to know more about the polishes she got, they're gorgeus! ;) Now for the nails she did:


Things she used: China Glaze Ahoy! and Hey Sailor + konads.
I like them, those polishes are really pretty!


Oh, Minnie tagged me this "What's in my purse?" -post! Thank you again, I'll do that one next! ;D
And omg, has my blog really reached 200 followers??? :D Thank you so much everyone, now I'll start doing that post about myself. ;)
So that's what's coming up, and more nail designs, of course! ^^

Siskoni KarzU voitti arvonnassa ihania China Glazen lakkoja, ja halusi lakata kynteni niillä. Kiitos vielä, näistä tuli tosi kivat!! ^^ Hän käytti China Glazen lakkoja Ahoy! ja Hey Sailor. Käykää tsekkaamassa hänen bloginsa, siellä on vielä erillinen postaus näistä kaikista lakoista. ;) Pohjalla on yksi kerros H&Mn Pink Mistiä, ja reunoihin pitsikuviot konadeilla.

Monday, May 30, 2011

London / New York?


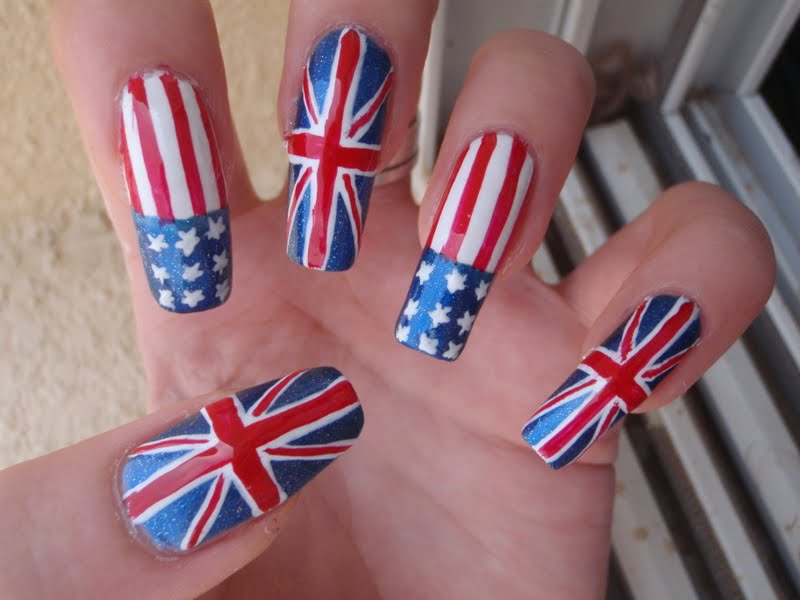
I've seen this kinds of designs a lot, but I like the idea so much I wanted to do my version of it. And I like it on my nails! ^^ This time I remembered to take pictures while making the design, so here's a little step-by-step tutorial for these flag-nails:

First I polished every other nail with white polish and every other with blue polish. Pictures and names of the polishes are in the end of this mini-tutorial. :)
Then I polished the tips of the white nails with the same blue I used to the whole blue nails...
I thought that it'd be better to create white base for the red first, so the red would come out brighter.
While waiting for the white crosses to dry, I did the red stripes of the USA flag.
Then the red for the England flag...
...and finally little stars for the USA flag. I  used a pin as a tiny dotting tool to make the stars small enough.
Here are the products I used: blue Claire's polish, Rimmel - London Clouds, white nail art polish by Kiss and red nail art polish by Winmax.
With top coat, in sunlight!
What do you think? Do you like this kinds of designs? I've always tought that "flag nails" look cool, I don't know what it is that fascinates me about them, maybe it's the colors. Or the fact that I've always wanted to go to New York or London... ;)
I'm really glad I made the stars properly, at first I was planning to be lazy and do just white dots or something, but then I decided spots don't look nearly as good as tiny stars! ^^ The stars were harder to do, but definitey worth it!
I'm also happy that finally my right hand nails look as good as left hand! Of course the nails are still shorter, but I even made the tiny stars properly! Usually my right hand doesn't look as good as left, because my left hand is very shaky when it comes to nail polishing... :'D I've been trying to work on that, and finally it's starting to look better. Unfortunately I don't have picture of them, but I hope you believe me! xD
Now some information about what's coming up: Swatches! I know it's a little boring, but I'll show you couple of my new polishes in action. ;) (the pink Sinful colors polish and couple of OPI polishes) Don't worry, my head is full of new nail designs I want to create, it's just that I'm a little slow. :'D Stay tuned! ^^
Check out Beyonce's nails at the diner! ;)


Olen aina ihastellut tämän tapaisia kynsiä muiden tekeminä, ja halunnut toteuttaa omille kynsillenikin tällaiset. Nyt tein viimeinkin oman versioni, ja täytyy sanoa että tykkään!! :D Näistä tuli juuri sellaiset kuin olin suunnitellut. Ylempänä on myös mini-tutoriali näihin, kun kerrankin muistin ottaa kuvan joka vaiheesta. :P Mitä mieltä te olette? Tykkäättekö "lippukynsistä"? :)
Tulossa: Swatcheja uusista lakkahankinnoista! On minulla kiinnostavampiakin ideoita, pää tuntuu olevan kerrankin täynnä uusia kynsi-ideoita joita haluaisin kokeilla, mutta aika ei tunnu riittävän... :'D No, seurailkaa, toteuttelen niitä parhaani mukaan! ^^


Wednesday, May 25, 2011

Swirly toe nails + new polishes

I'm sorry, my toes look crappy in these pics, but I liked this pedicure and wanted to share it here... :P Also it was so hot outside that I took the pics inside and the quality isn't the best. Anyway, I'm sure you get the idea of these:


First two coats of OPI Tease-y Does It and then the golden swirls with Golden Rose nail art polish, free hand. I was planning to just polish them quickly with some dark polish and leave it there, but then I remembered THIS design I made loooong time ago with that Golden Rose polish, and decided to do something with it again.


I also went shopping a little today, and found a shop which sells China Glaze and Sinful Colors polishes! I bought two new polishes:


Sinful Colors: Forget Now and Nail Junkie


Varpaankynsissä kaksi kerrosta OPIn Tease-y Does It ja päälle tein kiemuroita Golden Rosen nail art lakalla.
Tänään käytiin shoppailemassa ja löysin kaupan, joka myy Sinful Colorsin ja China Glazen lakkoja! Luulin että niitä ei saa täältä, mutta jess! Ostin sitten Forget Nown ja Nail Junkien. :)

Tuesday, May 3, 2011

Fishnet

Simple Konad-design for my older little sister this time (She also has a blog, you can find it HERE). :)


OPI - Tease-y Does It from Burlesque collection. Don't you just love that golden sparkle? *_*
Without stamping, two layers. Unfortunately I forgot to take a picture in direct sunlight, so the sparkle doesn't really show up in this picture... :<
I'm getting better with konads, right? Of course there's still some fails but for a whole nail pattern these turned out well. :)
The Tease-y Does It is really gorgeus polish, I'm disappointed I didn't manage a good photo of it... Once again a polish you should see IRL.

Tein vanhemmalle pikkusiskolle verkkokynnet. :) Lakkana oli OPIn Tease-y Does It Burlesque kokoelmasta. Upea tummanpunainen lakka, jossa on kultaista shimmeriä. Harmi etten tajunnut ottaa siitä auringonvalossa kuvaa... :P
Verkkokuvio konadeilla. Nyt alkaa jo sujua tuo koko kynnen kuvioiden leimaaminen, vaikka tietysti vielä on parantamisen varaa. :)


PS. I took henna tattoo again... Actually henna tattoos. ;) More about those in my next post! ^^

Saturday, October 9, 2010

Nail visitors

I was leafing through my new nail magazine, and I decided that I have to try some of them! So here we go:

My friends beautiful nails!
Polishes are: Charlie and NAIL STAR.
These are my sisters nails!
 And here´s where the inspiration came from:


And then I also polished my toe nails! I really like how they turned out:


Polka dots and black pearls, me likey!
Nail polish: Creative Starburst
I also used these on my sisters nails. :)
Kiss nail art polish silver
Inspiration source~

 One more pic of my sisters nails in the end:


Today I baked muffins with my friend! (her nails were the pink ones above) They are delicious, I´ll post pictures later. :3

Sippe was hugging my leg <3